Configure Customer Payment Gateways
Applies to: Administrators, Technical Staff
Payment Gateways are integrations with third-party processors that allow for automated deposit handling.
View Available Gateways
- Navigate to TR Settings > Customer Payment Gateways.
- You will see a list of available gateway integrations, both connected and available to connect.
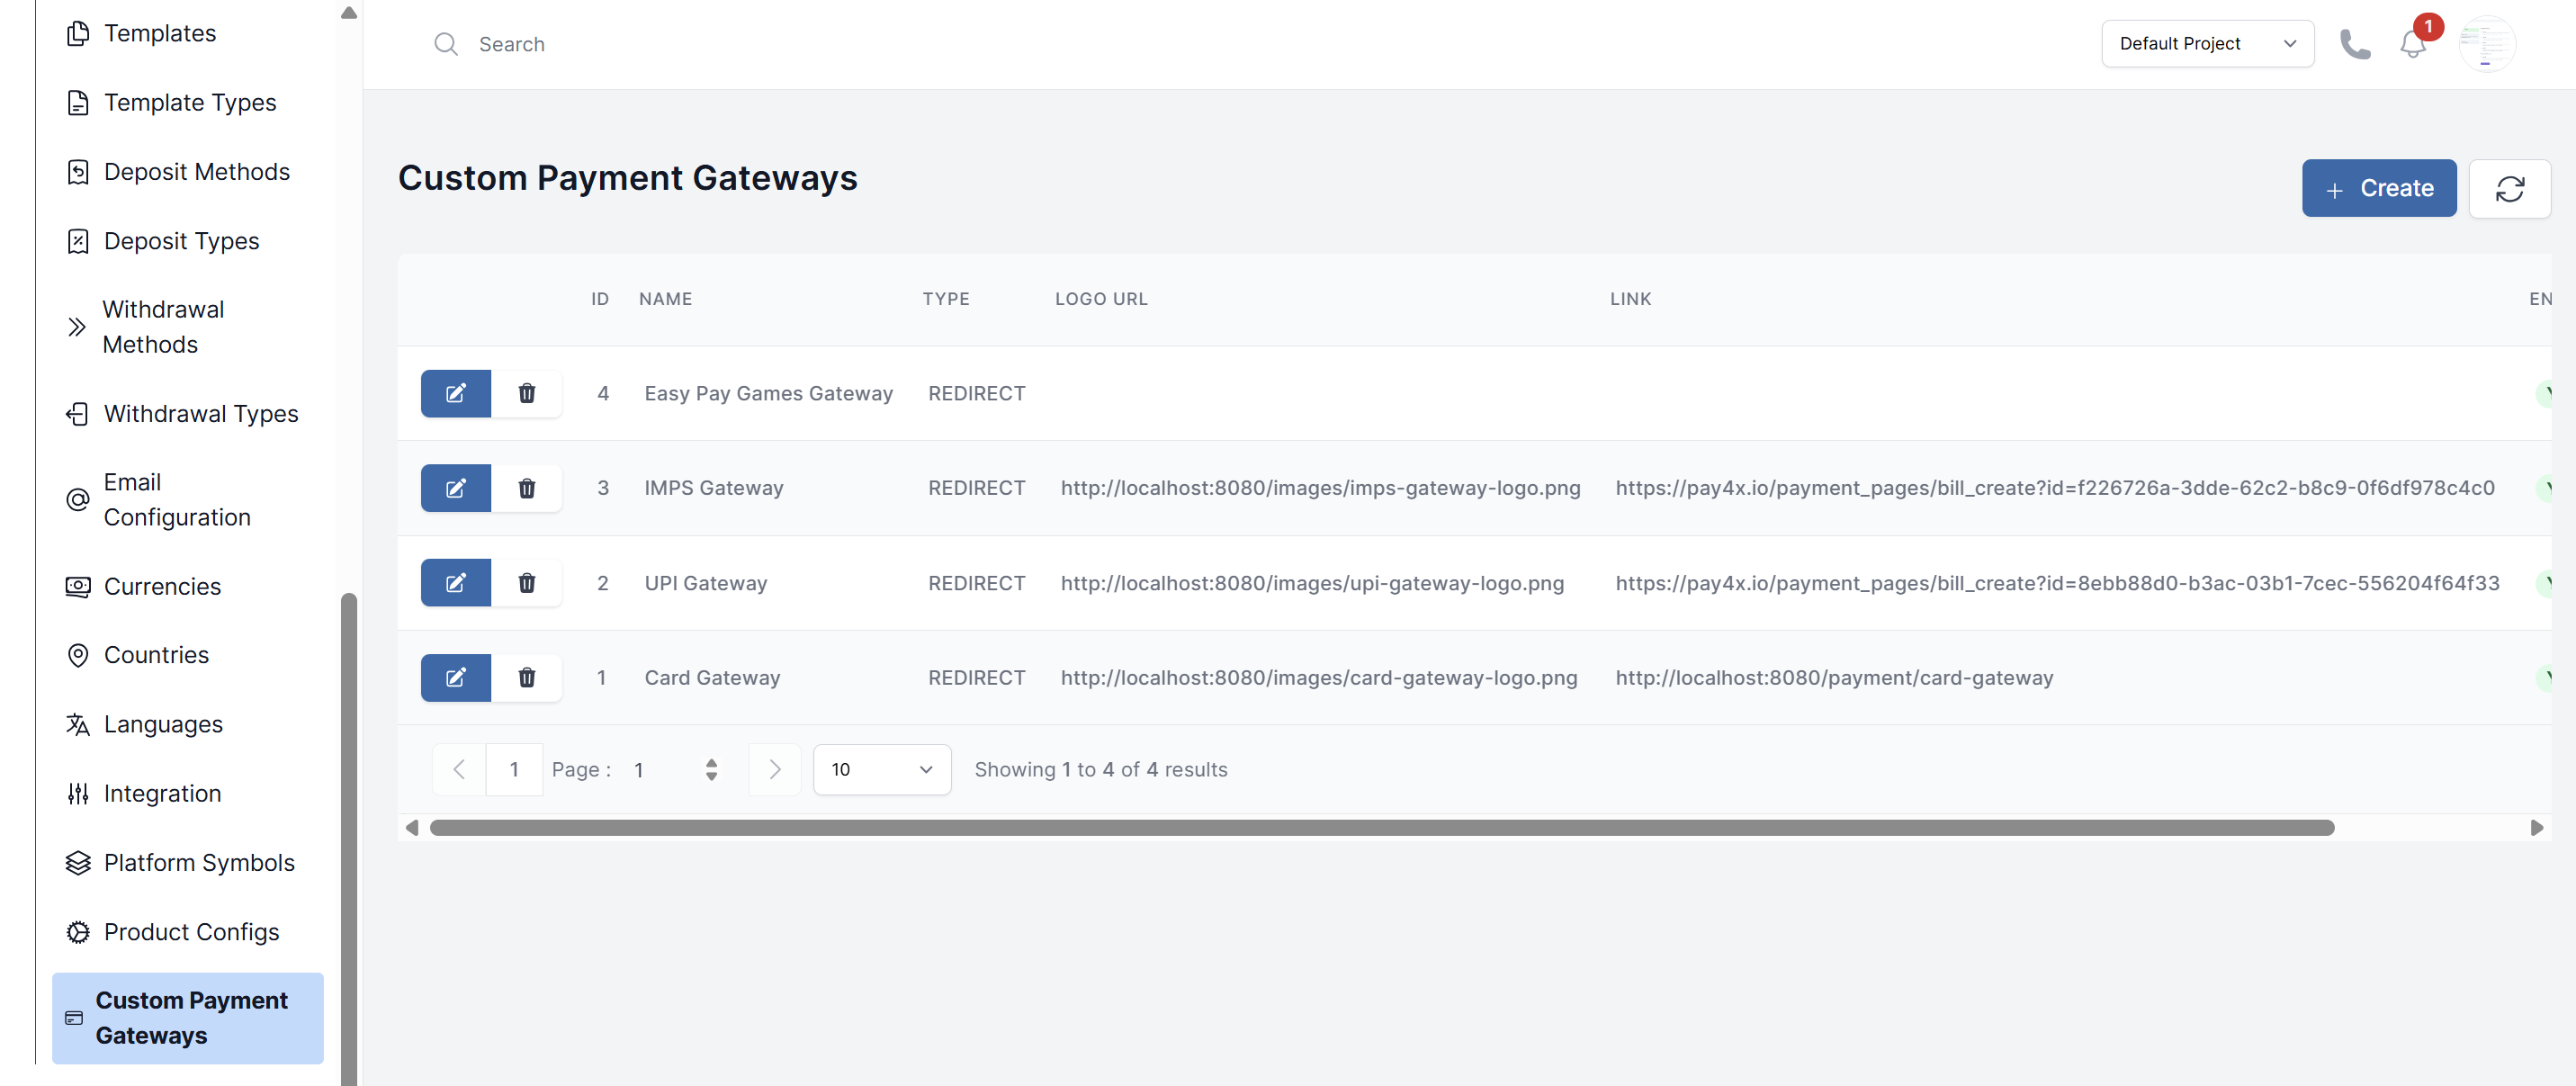
Edit Customer Payment Gateways
-
Navigate to TR Settings > Customer Payment Gateways.
-
Locate the gateway you want to modify from the list of connected gateways.
-
Click Edit or Configure next to the gateway name.
-
Update the following fields as needed:
- Gateway Name: Modify the display name for the payment gateway
- Logo URL: Update the gateway's logo image URL for customer-facing displays
- Link: Change the gateway's website or documentation link
- Type: Select the appropriate gateway type from the dropdown menu
- Status: Toggle between Enabled and Disabled using the "Is Enabled" dropdown
-
If updating sensitive credentials, you may need to enter your passcode for security verification.
-
Click Submit to save your changes or Cancel to discard them.
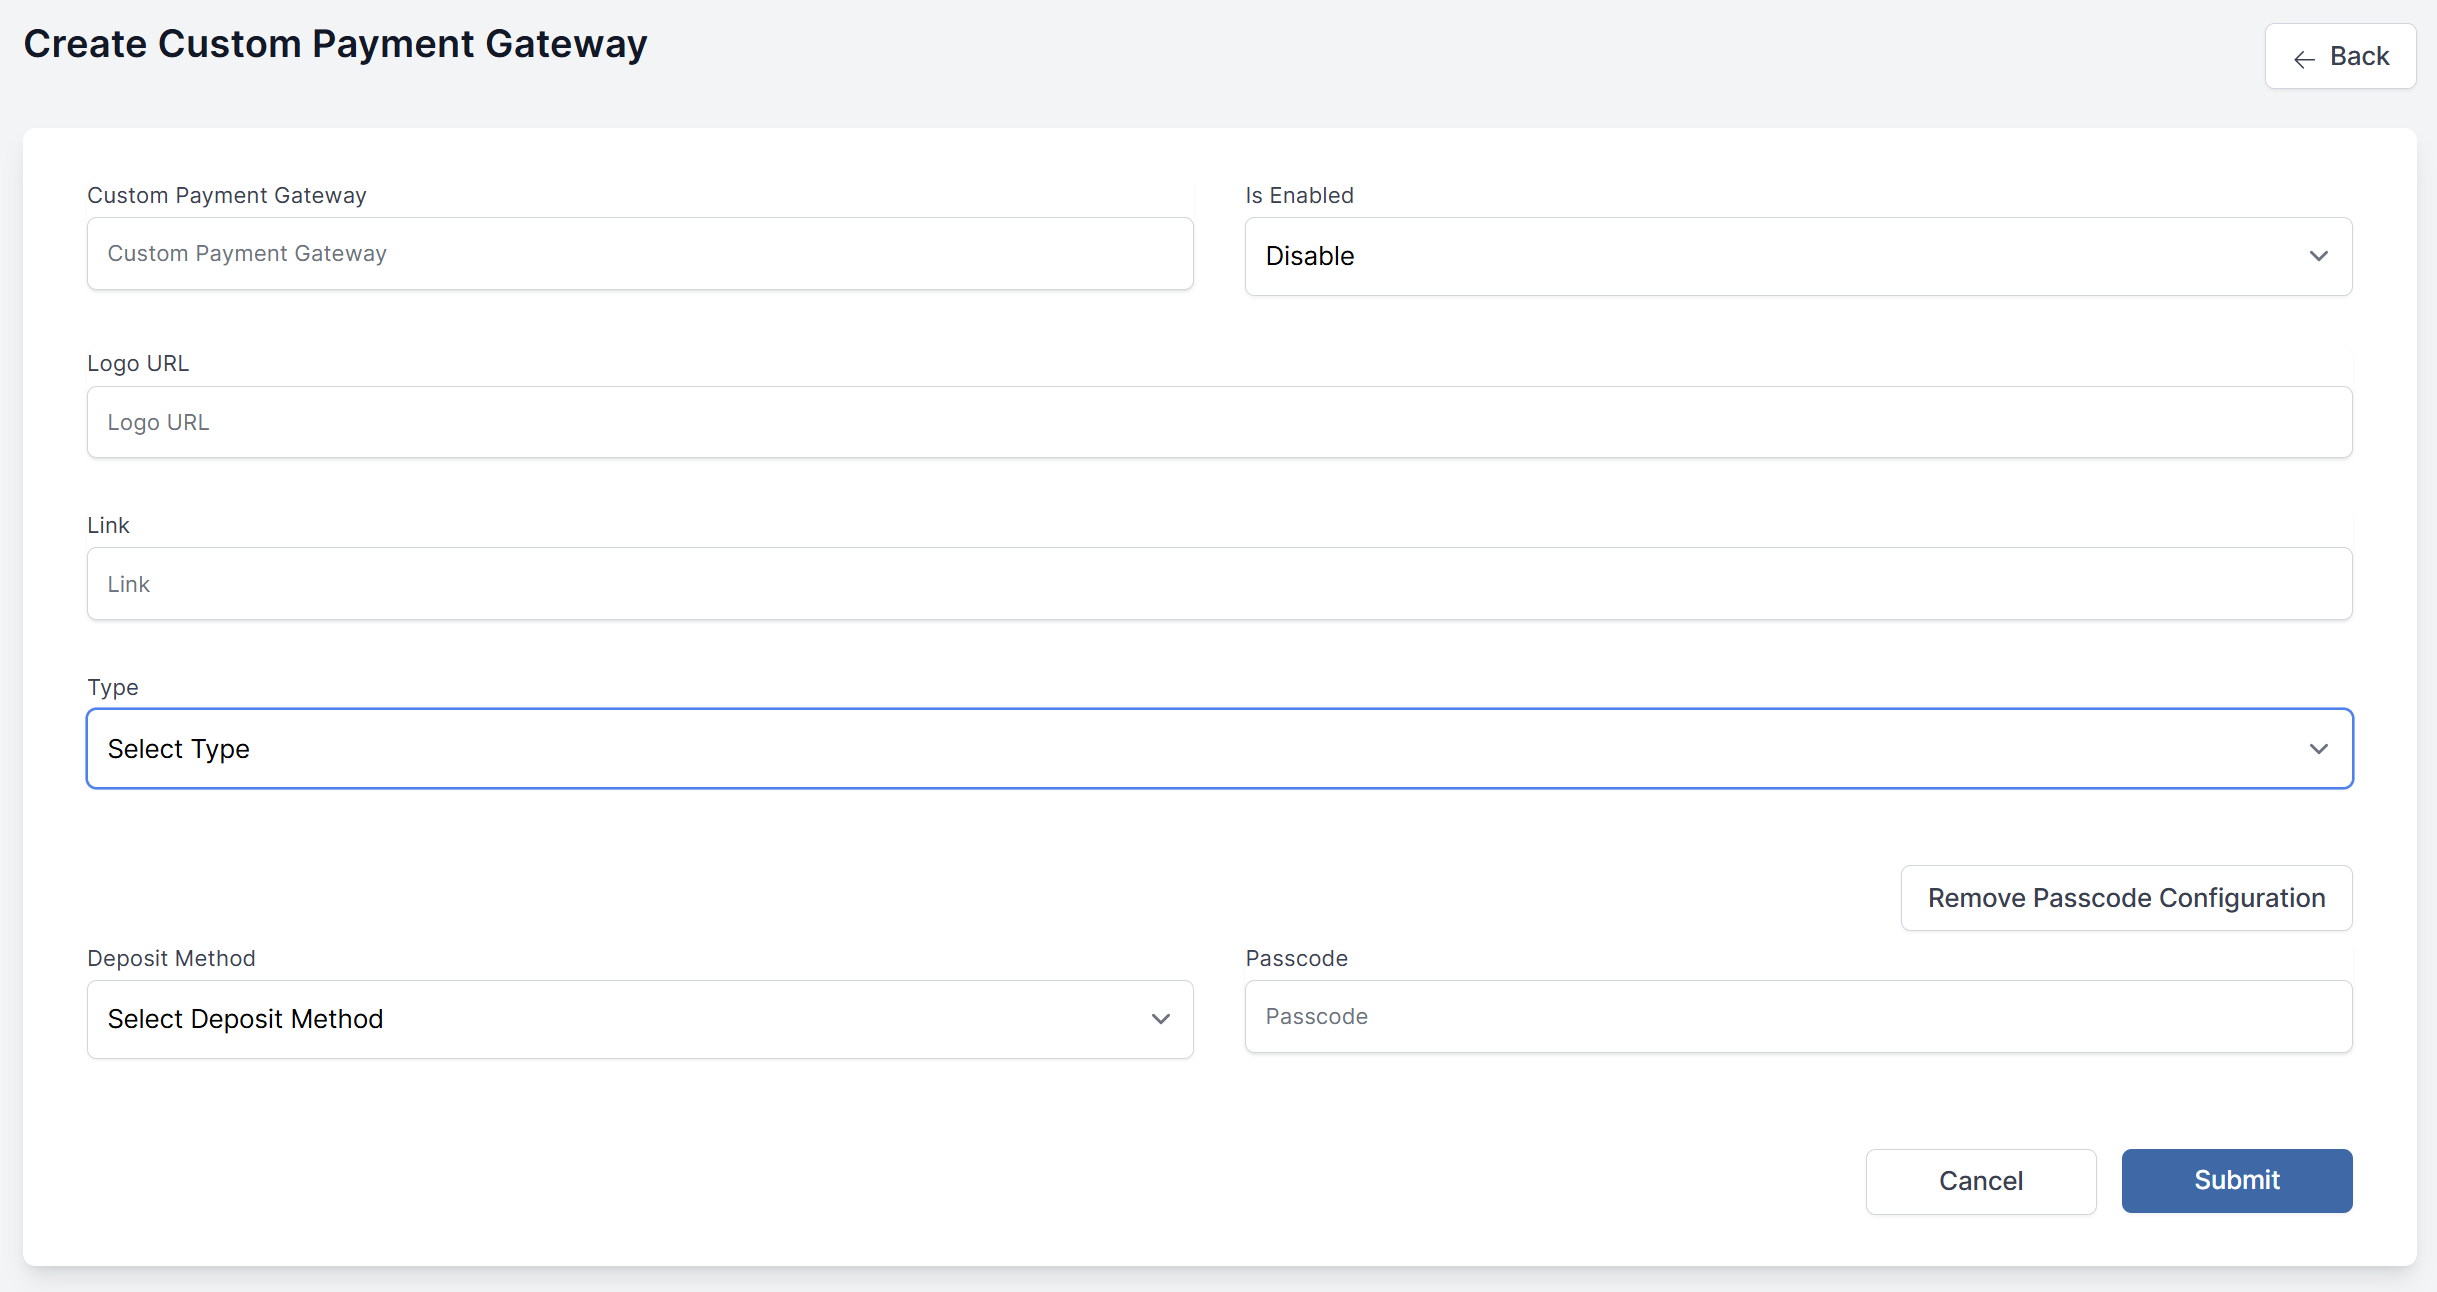
Setting Up a Gateway
- Navigate to TR Settings > Customer Payment Gateways.
- Click Create Custom Payment Gateway to open the gateway creation form.
- Fill in the required gateway information:
Basic Information:
- Custom Payment Gateway: Enter a unique name/identifier for your custom gateway
- Logo URL: Provide a direct URL to your gateway's logo image (this will be displayed to customers)
Link: Add your gateway's website URL or documentation link for reference
Gateway Configuration:
- Type: Select the appropriate gateway type from the dropdown menu
- Deposit Method: Choose the specific deposit method from the available options in the dropdown
Security Settings:
- Passcode: Enter a secure passcode for gateway authentication and critical operations Use Remove Passcode Configuration button if you need to clear the current passcode setup
Activation:
- Is Enabled: Keep set to Disable during setup and testing, change to Enable when ready to go live
Review Configuration: Verify all entered information is correct before proceeding. Submit Gateway: Click Submit to create the custom payment gateway, or Cancel to discard changes.
Testing
Always test the gateway in a sandbox/staging environment first by making a small deposit to ensure notifications and balance updates work correctly.