Your First Day as an Agent
Welcome to your main guide! This page covers the tasks you will perform every day. Following these steps will help you stay organized and effective.
Step 1: Find Your Leads on the Dashboard
Your day starts at the main dashboard (Leads > General). Use the quick filters at the top to find the leads you need to work on:
All Leads: See every lead assigned to you.Show Follow Ups: See who you need to call back today.Fresh Leads: See brand-new leads you haven't worked on yet.
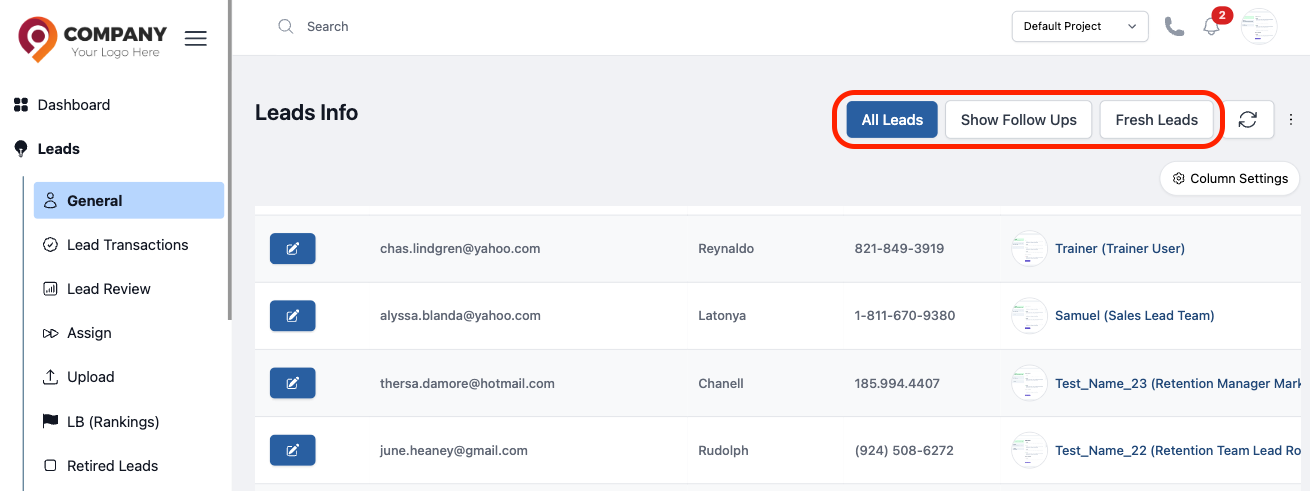
Figure 1: Leads
Step 2: Open and View the Lead Profile
Click on any lead's name to open their Profile. This is your main workspace for each customer.
Viewing the Lead Summary
The first thing you'll see is the Summary. This is a snapshot of all the most important information about the lead: their contact details, the campaign they came from, their current stage, and more. Always review this section first.
Using Quick Actions
At the top of the profile, you have instant communication buttons:
- 💬 WhatsApp: Opens a chat with the lead.
- 📞 Call: Dials the lead directly through the CRM using an internet (VoIP) service.
- ✉️ Email: Opens your email program to write to the lead.
To enable the Call feature, a manager must integrate and configure a 3rd party VoIP service (like Impact PBX). Without this setup, the call button will not function.
You may see a Delete button on the lead's profile. This button will only appear if a manager has given you specific permission to delete leads.
Using Comments and the Timeline
- Comments: This is your digital notebook. After every interaction with a lead, you should add a note in the Comments section. You can also pin the most important comment to the top by clicking the pin icon.
- Timeline: The Timeline on the right shows a quick history of the most recent activities, so you can see what just happened at a glance.
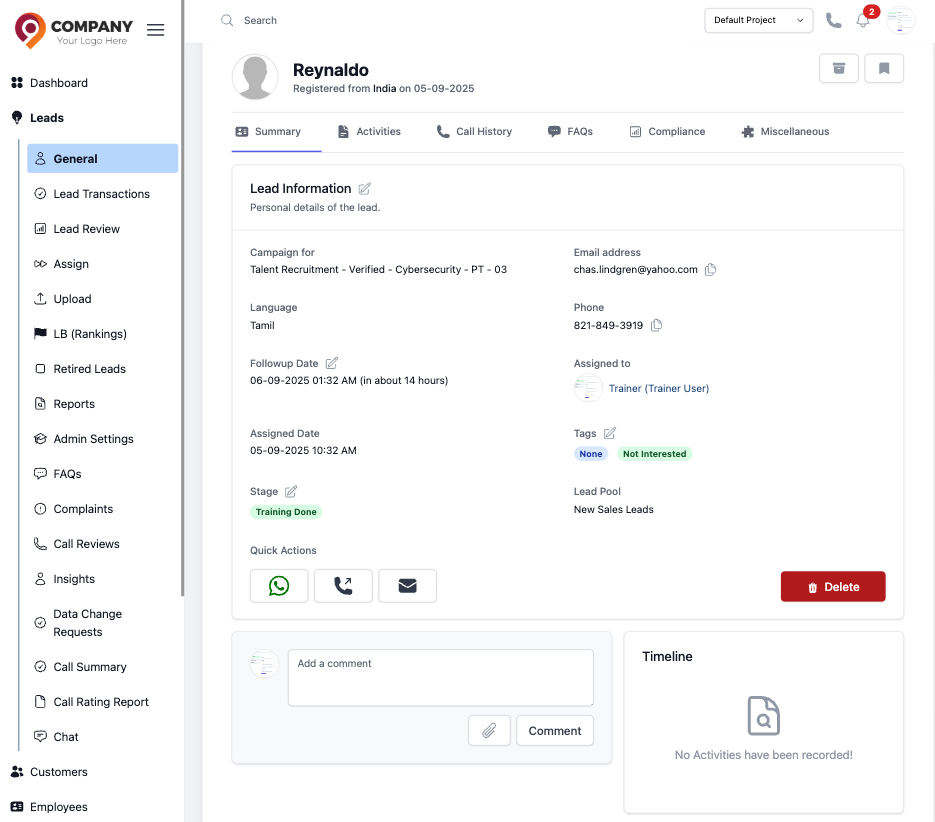
Figure 2: Lead Summary
Step 3: Performing Your Daily Actions
Inside the lead's profile, you have a toolbox of actions to update the lead's status and record your interactions. These are the tasks you will do most often.
Action 1: Update Lead Details (Set Master Data)
- What it is: This is the "Edit" button for the lead's main information (like their name or phone number).
- How it works: When you update the information, it creates a Data Change Request. This is sent to your manager to double-check and approve the change, which helps keep our data accurate.
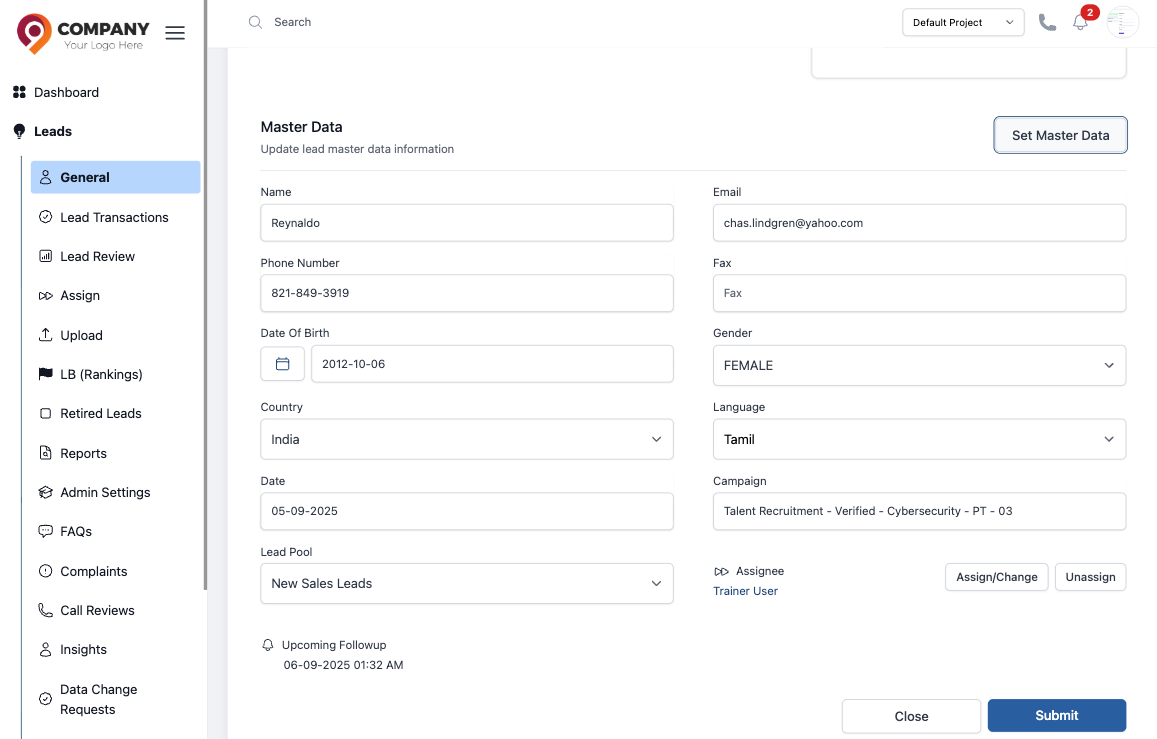
Figure 3: Lead Master Data
An agent's request to update lead info must be approved by a manager. Managers can find the approval queue here: Managing Data Change Requests.
Action 2: Add a Tag (Set Tags)
- What it is: Tags are labels you can stick on a lead to organize them (e.g.,
Interested,No Answer). - How it works: Adding a tag is a powerful action. Depending on the tag, one of three things can happen:
- Simple Labeling: Most tags are simple labels that you can add and remove freely to help you organize your work.
- Requires Approval: Some important tags may require your manager's approval. When you add one of these, it creates a Data Change Request.
- Triggers an Action: Some special tags can trigger an automated workflow. For example, adding an "other-language" tag might automatically unassign the lead from you and move it to a different list. Always be sure you are using the correct tag!
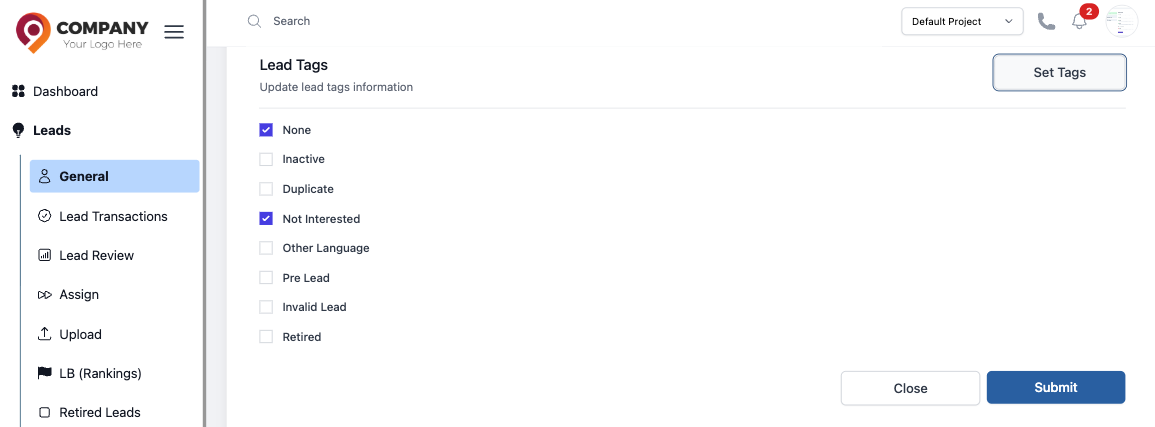
Figure 4: Lead Tags
ℹ️ You have powerful controls for tags. In Admin Settings, you can:
- Use the "Is Modifiable" setting to require approval for important tags.
- Use the "Lead Tag Workflow Config" to automate actions, like unassigning an agent or moving a lead to a new pool when a specific tag is applied.
- Please see the Lead Tags reference.
Action 3: Change the Lead Stage (Set Lead Stage)
- What it is: This is how you move a lead through your sales process. For example, you might change their stage from
NewtoContactedafter your first call.
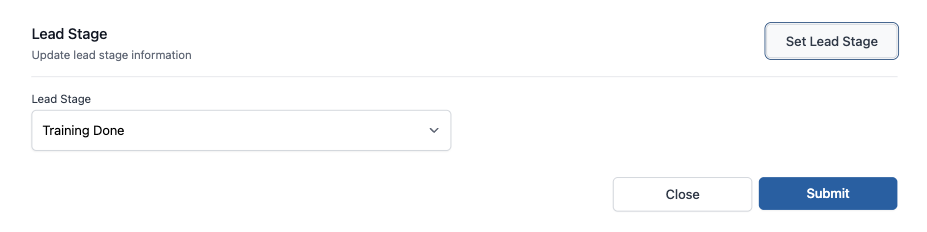
Figure 5: Lead Stages
The sales stages are defined by a manager. To configure them, please see the Lead Stages reference.
Action 4: Set a Reminder (Follow up date)
- What it is: This is one of the most important daily actions. Use this to set a date and time for your next conversation with the lead. This will make the lead appear in your "Show Follow Ups" view on that day.

Figure 6: Lead Followup
Action 5: Create a Deposit
- What it is: Use this action to record a deposit payment made by a lead.
- How it works: After you submit a deposit, it is sent to your manager for approval in a section called
Lead Transactions.
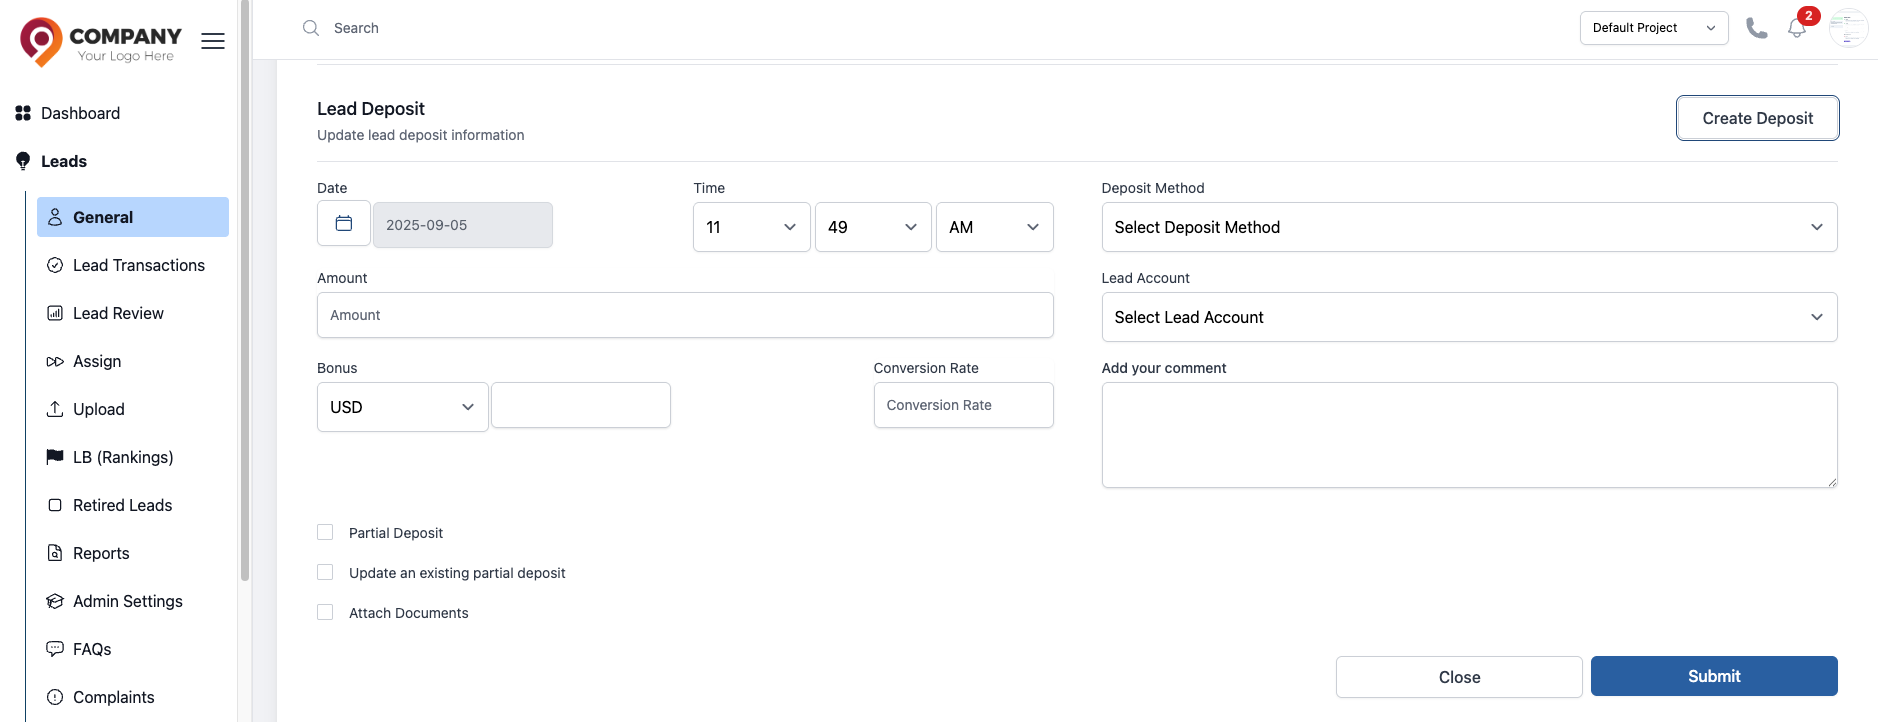
Figure 7: Lead Deposit
The types of deposits and payment methods are set up by a manager. After an agent submits a transaction, the manager must approve it.
Action 6: Create a Withdrawal
- What it is: Similar to a deposit, you use this to record a withdrawal for the lead.
- How it works: This action also sends an approval request to your manager, which they will handle in the
Lead Transactionssection.
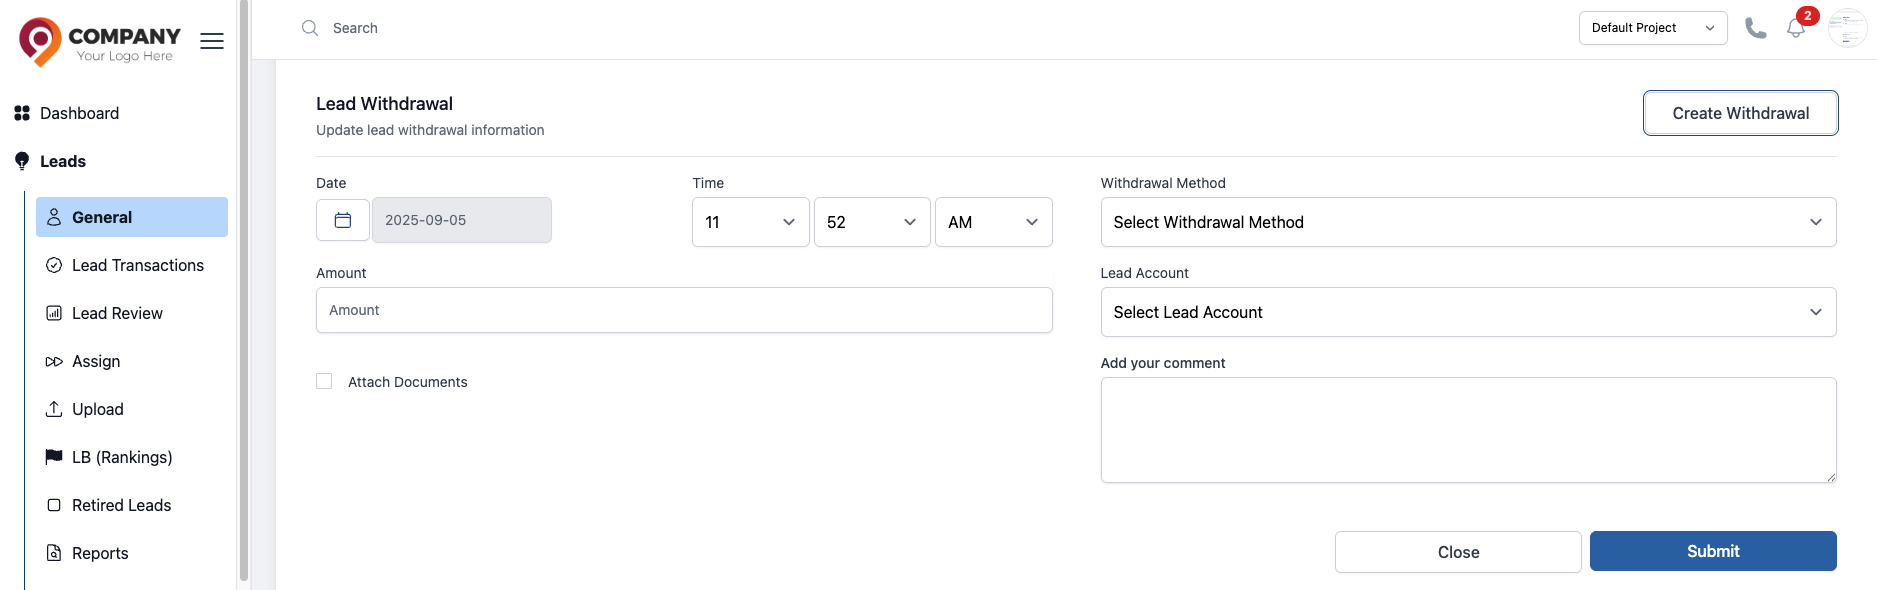
Figure 8: Lead Withdrawal
Action 7: Create an Account for Withdrawal
- What it is: This action allows you to set up or record the account details (e.g., bank account) needed for a lead to make a withdrawal.
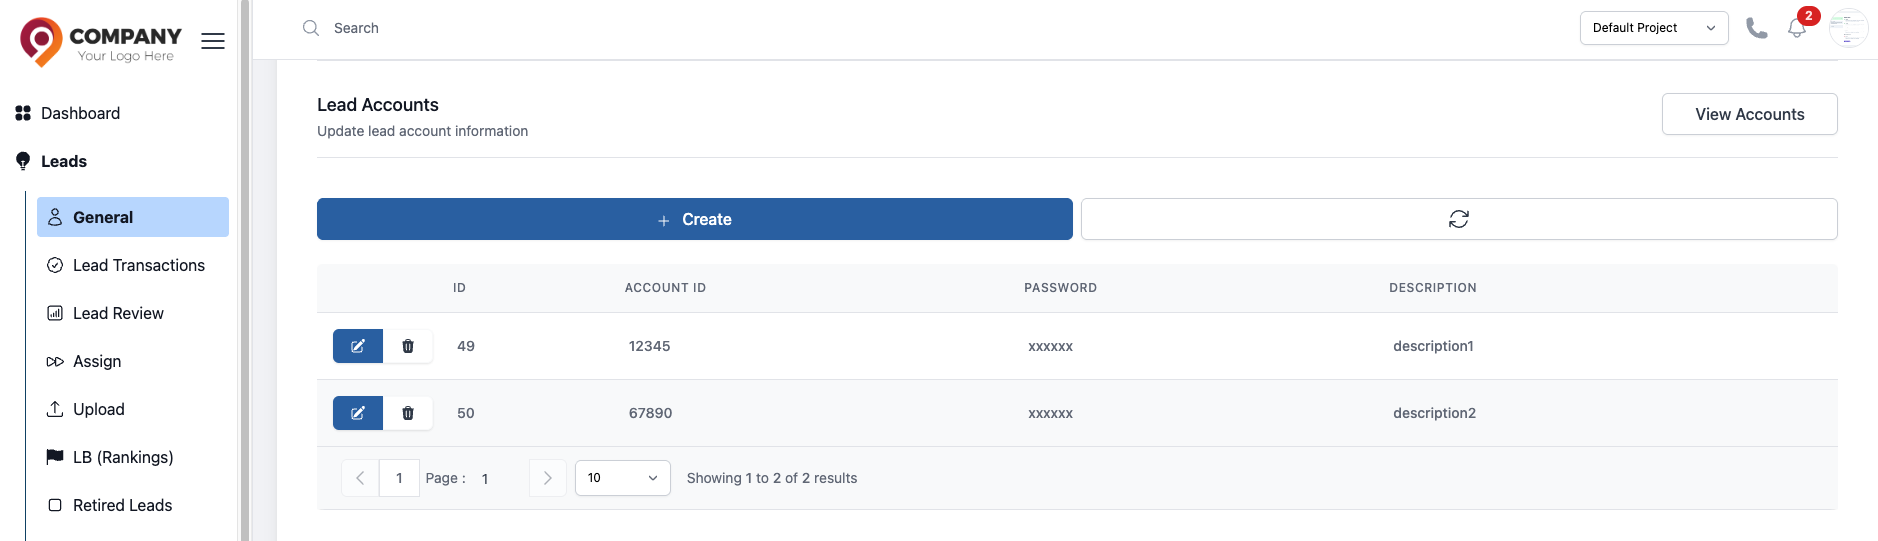
Figure 9: Lead Account
Action 8: Create a Complaint
- What it is: If a lead has an issue or a complaint, you can formally record it here. This creates a record that can be tracked and resolved by management.
The categories of complaints are set up by a manager. To configure them, please see the Lead Complaint Types reference.

Figure 10: Lead Complaint
Be aware that if a lead has no activity (like a comment or a status change) for a long period, the system might automatically unassign it from you. These are often called "Retired Leads".
This is done to make sure no lead is forgotten! The time period for inactivity is set by your manager. So, make sure to regularly interact with your leads to keep them active in your list. You can refer your manager to the Retired Leads reference.